SD/MMC Card interfacing with MUC with AVR Microcontrollers
Interfacing with ATMega 162:
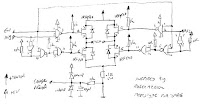
It is easy to interface a MMC (Multimedia Card) with an Atmel ATmega162 (AVR series) via the SPI (Serial Port Interface). The MMC is connected to the SPI pins of the ATmega16 via simple resistor voltage dividers to transform the +5V high levels to about 3.3V used by the MMC. If the Atmega-162 is working on 3.3 V power supply then all the MMC pins can be directly connected to Microcontroller (as in this design). The data-out pin from the MMC goes directly to the ATmega162, because 3.3V is high for the ATmega162 anyway. The schematic of the MMC interfacing is given below.
http://devusb.googlepages.com/sdmmcinterfacing
Microcontroller board with Ethernet, MMC/SD card interface and USB
Hardware components already integrated on the reference design include:
• Atmel ATmega128 RISC microcontroller with standard 10-pin ISP header
• 64 kByte of external SRAM
• USB <-> RS232 interface
• SD/MMC socket
• Ethernet interface with ENC28J60 (IEEE 802.3, 10Base-T)
The hardware design is expandable by connecting additional components to the existing pin header. Several digitial I/Os, A/D inputs as well as the standard SPI and I2C (TWI) serial interfaces are available for user-defined purposes.
The curcuit board is designed as a two-layer board of size 100mm x 80mm. Most components use SMD packages.
http://www.roland-riegel.de/mega-eth/index.html
SD/MMC Interface Integration Guidelines
SD/MMC cards provide a low cost solution for data logging and storage applications
for embedded systems. SD/MMC cards can be easily interfaced with a
Microcontroller using an SPI interface and between one and three control lines. While
the electrical interface is relatively straight forward, successfully implementing a
solution can be time consuming for the initial implementation. This document looks at
some of the common pitfalls encountered. The document assumes the developer is
implementing Brush Electronics SD/MMC File System drivers or Utilities with a
Microchip PIC Microcontroller however the principles apply to other implementations.
http://www.smallridge.com.au/download/SD-MMC%20Integration.pdf
MMC/SD Card interfacing and FAT16 Filesystem with 8051/8052
Content
# Interface to Chan’s Library of functions
# Target development platform
# Setting up the SPI port during startup.A51
# Global type definitions and variables
# Basic SPI function
1. Transferring & Receiving single byte over SPI Bus
2. SPI Chip Select
3. Setting frequency for SPI Clock
4. Sending command to SD Card
5. Reading response from SD Card
6. Delay and Time function
# SD Card Initialization
1. Setting up the card for SPI Communication
# Reading and Writing a single sector
# Working with diskio.c
# Pulling it all together
http://www.8051projects.net/mmc-sd-interface-fat16/MMC-SD-Card-interfacing-and-FAT16-Filesystem.pdf
Tuesday, July 28, 2009
Saturday, July 18, 2009
H-Bridge Motor Driver Circuit
H-Bridge
This circuit drives small DC motors up to about 100 watts or 5 amps or 40 volts, whichever comes first. Using bigger parts could make it more powerful. Using a real H-bridge IC makes sense for this size of motor, but hobbyists love to do it themselves, and I thought it was about time to show a tested H-bridge motor driver that didn't use exotic parts.
http://www.bobblick.com/techref/projects/hbridge/hbridge.html
H-bridge using P and N channel FETs
This H-bridge uses MOSFETs for one main reason - to improve the efficiency of the bridge. When BJT transistors (normal transistors) were used, they had a saturation voltage of approximately 1V across the collector emitter junction when turned on. My power supply was 10V and I was consuming 2V across the two transistor required to control the direction of the motor. 20% of my power was eaten up by the transistors. I tried darlingtons etc... nothing worked. The transistors also would get quite hot - no room for heatsinks.
http://www.armory.com/~rstevew/Public/Motors/H-Bridges/Blanchard/h-bridge.htm
N-Channel H-bridge Motor Drive
In low voltage motor drives, it is common practice to use
complementary MOSFET half-bridges to simplify the gate
drive design. However, the P-channel FET within the
half-bridge usually has a higher on resistance or is larger
and more expensive than the N-channel FET. The alternative
solution is to design in an N-channel half-bridge.
http://www.eetkorea.com/ARTICLES/2004MAY/2004MAY18_BD_MSD_PD_AN.PDF
Comparator Controlled H-Bridge Circuits (LM311)
The next two circuits are simple Bi-Polar H-Bridge circuits. The bridges are controlled by a pair of LM311 voltage Comparators.
The LM311 Voltage Comparator has several unique features, one of which is an output transistor with an open emitter as well as the typical open collector. This allows the output transistor of the comparator to sit between the bases of the power transistors.
http://home.cogeco.ca/~rpaisley4/HBridge.html
Robot Motor control
In order to control the speed/torque of a motor, a so called H-bridge can be used. I built/designed one myself, using 4 MOSFETs.
http://www.iwhat.nl/rienatmarobi/bots/Wheeley/motor/index.html
Bidirectional operation (H-bridge circuit)
We have achieved speed control and have made a powerful drive circuit. However in robotic work we also usually want to be able to drive a motor either clockwise or counterclockwise. Before we discuss the use of transistors to solve this problem
http://www.mech.uwa.edu.au/NWS/How_to_do_stuff/micro_crash_course/pwm/
ป้ายกำกับ:
Motor Driver
Saturday, July 11, 2009
DC Motor Speed Control Circuit
Speed Controller Circuit
The robot I intend to build will be a 4WD bot with a skid steer system so to do this best I have opted to build 2 a controller system moulded around a 4QD DCI111. (A DCI111 converts radio signals into useable signals) Because of this the inputs on my controllers have to be similar to the 4QD units. The next things to consider are the motors that I will be using. Bosch 750’s seem to be quite popular (so are ford escorts and they are crap) so I will just go ahed and use the many starter motors that I have lying around. This results in
more
DC Motor Control & Interfacing Circuit
A permanent magnet DC motor responds to both voltage and current. The steady state voltage across a motor determines the motor’s running speed, and the current through its armature windings determines the torque. Apply a voltage and the motor will start running in one direction; reverse the polarity and the direction will be reversed. If you apply a load to the motor shaft, it will draw more current, if the power supply does not able to provide enough current, the voltage will drop and the speed of the motor will be reduced. However, if the power supply can maintain voltage while supplying the current, the motor will run at the same speed. In general, you can control the speed by applying the appropriate voltage, while torque is controlled by current. In most cases, DC motors are powered up by using fixed DC power supply, therefore; it is more efficient to use a chopping circuit.
more
PWM D.C. motor drive Circuit
This circuit is a very compact switching regulator for small DC motors. I use it for my small printed circuit board drill (18 Volt, 1.5 Amp), but it is suitable for many other applications (e.g. 12V DC halogen dimmer).
more
Back EMF PM Motor Speed Control Circuit
A 12 V control supply and a TRW BL11, 30 V motor are used; with minor changes other motor and control voltages can be accommodated. For example, a single 24 V rail could supply both control and motor voltages. Motor and control voltages are kept separate here because CMOS logic is used to start, stop, reverse and oscillate the motor with a variable delay between motor reversals.
more
Bidirectional DC Motor Speed Controller
This kit allows controlling the speed of a DC motor in
both the forward and reverse direction. The range of
control is from fully OFF to fully ON in both directions.
This kit overcomes both these problems. The direction and
speed is controlled using a single potentiometer. Turning
the pot in one direction causes the motor to start spinning.
Turning the pot in the other direction causes the motor to
spin in the opposite direction. The center position on the
pot is OFF, forcing the motor to slow and stop before
changing direction.
more pdf
PWM DC Motor Speed Control
The left half of the 556 dual timer IC is used as a fixed frequency square wave oscillator. The oscillator signal is fed into the right half of the 556 which is configured as a variable pulse width one-shot monostable multivibrator (pulse stretcher).
more
DC Motor Controlled with PWM Resources
Here is a description of the driver circuit. It's based on the Microchip AN531 Application Note titled "Remote Positionner". The circuit given in the application Note do not work , so this is a correction of the circuit:
more
DC MOTOR CONTROL USING A SINGLE SWITCH
This simple circuit lets you run a DC motor in clockwise or anti-clockwise
direction and stop it using a single switch. It provides a constant voltage for
proper operation of the motor. The glowing of LED1 through LED3 indicates that
the motor is in stop, forward rotation and reverse conditions, respectively.
more pdf
Bidirectional DC motor speed control using Pulse Width Modulation
The simplest method of implementing microcontroller controlled H-bridge drive of a reversible DC motor is to buy one of many commercial H-bridge IC's availible on the market. These can be purchased separately as an H-Bridge with a separate H-Bridge controller IC, or as an all-in-one IC. Unfortunately, there are several hurdles that sometimes frustrate this approach. Students often find these devices hard to find, as they are apparently in high demand. Secondly, many of these devices have limited current drive ability, such that larger DC motors end up running sluggish or stalling easily. One option is to build your own H-bridge from discrete parts, as shown below.
more
Low-Cost DC Motor Speed Control with CMOS ICs
Two low-cost CMOS ICs manage a 12 VDC, current-limited speed
control circuit for DC brush motors. The circuit design (see
Figure 1) uses PWM (pulse width modulation) to chop the effective
input voltage to the motor. Use of CMOS devices gives the benefits
of low power, minimal heat and improved longevity. The overall
design is simple, inexpensive and reliable, and is useful in applications
such as embedded DC motor control where efficiency,
economy and performance are essential.
more pdf
Digital Speed Control by Anthony Psaila
My design is based around three parts:
1. The controller board. This is a fully digital circuit that takes the 1ms to 2ms pulse from the receiver and converts it into a pwm train at 1Khz. It uses six cmos ics (74hc and 40 series) and a 4Mhz crystal clock. The only other components are one resistor and two capacitors to complete the crystal clock and a capacitor across the supply for smoothing. This was built on a printed board measuring 2 x 2.25 inches using standard components (on the boat there was no shortage of space). If surface mounted devices are used, the lot can be crammed into a much smaller space. The circuit can give a resolution of 128 steps (7bits). Some day I will expand it to have reverse function, but this is better done by a switcher circuit supplied from another channel (my reciever can give 7 channels and I am using only two at present).
more
ป้ายกำกับ:
Motor Driver
Friday, July 3, 2009
Brushless DC Motors Theory and Driver Circuit
Why use brushless DC motors (advantages/disadvantages)?
Brushless DC motors are synchronous motors suitable for use as a simple means of controlling permanent drives (e.g. ABS pumps, EHPS pumps, fuel pumps or cooling fans). This type of 3-, 4- or 5-phase brushless DC motor will increasingly replace brushed DC motors. Brushed DC motors require maintenance, e.g. to service coal brushes and commutator. Another major problem with a brushed DC machine is the possibility of brush burnout in the event of an overload or stall condition.
Functional principle of a brushless DC motor
Figure 1 shows a three-phase brushless DC motor with two pole pairs. The rotation of the electrical field (vector) has to be applied twice as fast as the desired mechanical speed of the brushless DC motor. The three coils of the stator are split into two groups of coils (A, B, C and A’, B’, C’). As you can see in Figure 1, coils A and C are energized and coil B is not energized. A 0° to 180° rotation will be shown in detail in section 2.1 to explain the setting of the appropriate switches of the B6 bridge pattern, the appropriate voltages relating to the coils, and the energized coils of the motor with the suitable rotor position between 0° and 180° mechanical.
Brushless DC Motors wiring diagrams
The wiring diagrams for a 3-pole armature (stator) Brushless DC Motors
The wiring diagrams for a 6-pole armature Brushless DC Motors
more
Brushless DC Motors Animation
Brushless DC motors are refered to by many aliases: brushless permanent magnet, permanent magnet ac motors, permanent magnet synchronous motors ect. The confusion arises because a brushless dc motor does not directly operate off a dc voltage source. However, as we shall see, the basic principle of operation is similar to a dc motor.
more
Introduction to Brushless DC Motors
Brushless Motor Construction
DC brushless motors are similar in performance and application to brush-type DC motors. Both have a speed vs. torque curve which is linear or nearly linear. The motors differ, however, in construction and method of commutation. A brush-type permanent magnet DC motor usually consists of an outer permanent magnet field and an inner rotating armature. A mechanical arrangement of commutator bars and brushes switches the current in the armature windings to maintain rotation. A DC brushless motor has a wound stator, a permanent magnet rotor assembly, and internal or external devices to sense rotor position. The sensing devices provide signals for electronically switching (commutating) the stator windings in the proper sequence to maintain rotation of the magnet assembly. The rotor assembly may be internal or external to the stator in a DC brushless motor. The combination of an inner permanent magnet rotor and outer windings offers the advantages of lower rotor inertia and more efficient heat dissipation than DC brush-type construction. The elimination of brushes reduces maintenance, increases life and reliability, and reduces noise and EMI generation.
DC Brushless Motor Control Block Diagram
more
Brushless DC Motor driver circuit
Closed Loop Brushless DC Motor Control With the MC33033 Using the MC33039 driver circuit
The MC33033 is a high performance second generation, limited
feature, monolithic brushless dc motor controller which has evolved
from ON Semiconductor's full featured MC33034 and MC33035
controllers. It contains all of the active functions required for the
implementation of open loop, three or four phase motor control. The
device consists of a rotor position decoder for proper commutation
sequencing, temperature compensated reference capable of supplying
sensor power, frequency programmable sawtooth oscillator, fully
accessible error amplifier, pulse width modulator comparator, three
open collector top drivers, and three high current totem pole bottom
drivers ideally suited for driving power MOSFETs. Unlike its
predecessors, it does not feature separate drive circuit supply and
ground pins, brake input, or fault output signal.
more pdf
THREE-PHASE BRUSHLESS DC MOTOR driver circuit
The L6235 is a DMOS Fully Integrated Three-Phase
Motor Driver with Overcurrent Protection.
Realized in MultiPower-BCD technology, the device
combines isolated DMOS Power Transistors with
CMOS and bipolar circuits on the same chip.
The device includes all the circuitry needed to drive a
three-phase BLDC motor including: a three-phase
DMOS Bridge, a constant off time PWM Current Controller
and the decoding logic for single ended hall
sensors that generates the required sequence for the
power stage.
more pdf
3-Phase Full-Wave PWM Driver for Sensorless brushless Motors driver circuit
The TB6588FG is a three-phase full-wave PWM driver for
sensorless brushless DC (BLDC) motors. It controls rotation speed
by changing the PWM duty cycle, based on the voltage of an
analog control input.
more pdf
ป้ายกำกับ:
Motor Driver
Subscribe to:
Posts (Atom)